Shopify
Setup
Shopify
Start by logging into your Shopify store
Click on Settings in the lower left of the screen
Click on Apps and Sales Channels in the navigation
Click on the Develop Apps button
You should now see a screen similar to:
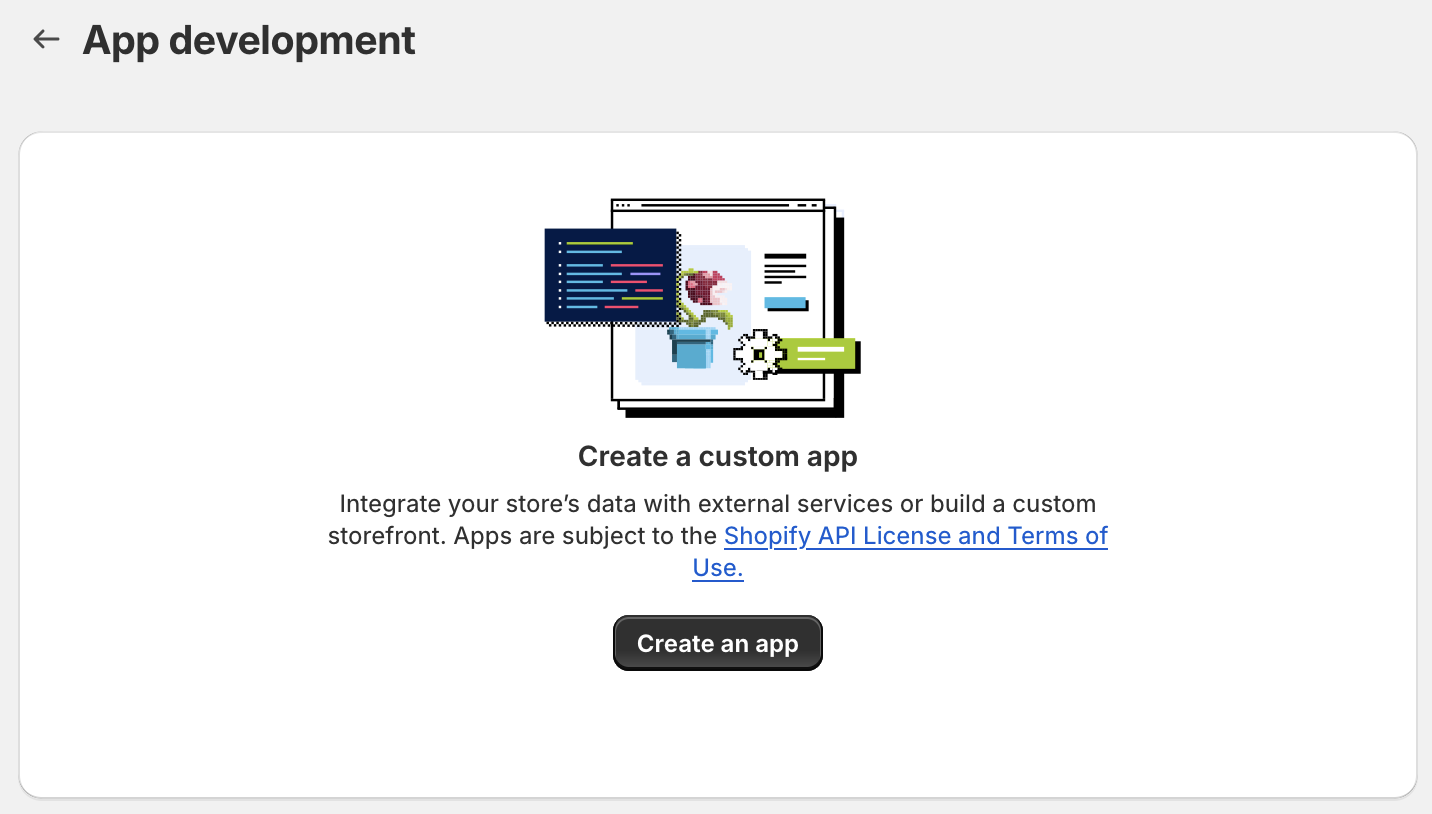
Click on the Create an app button
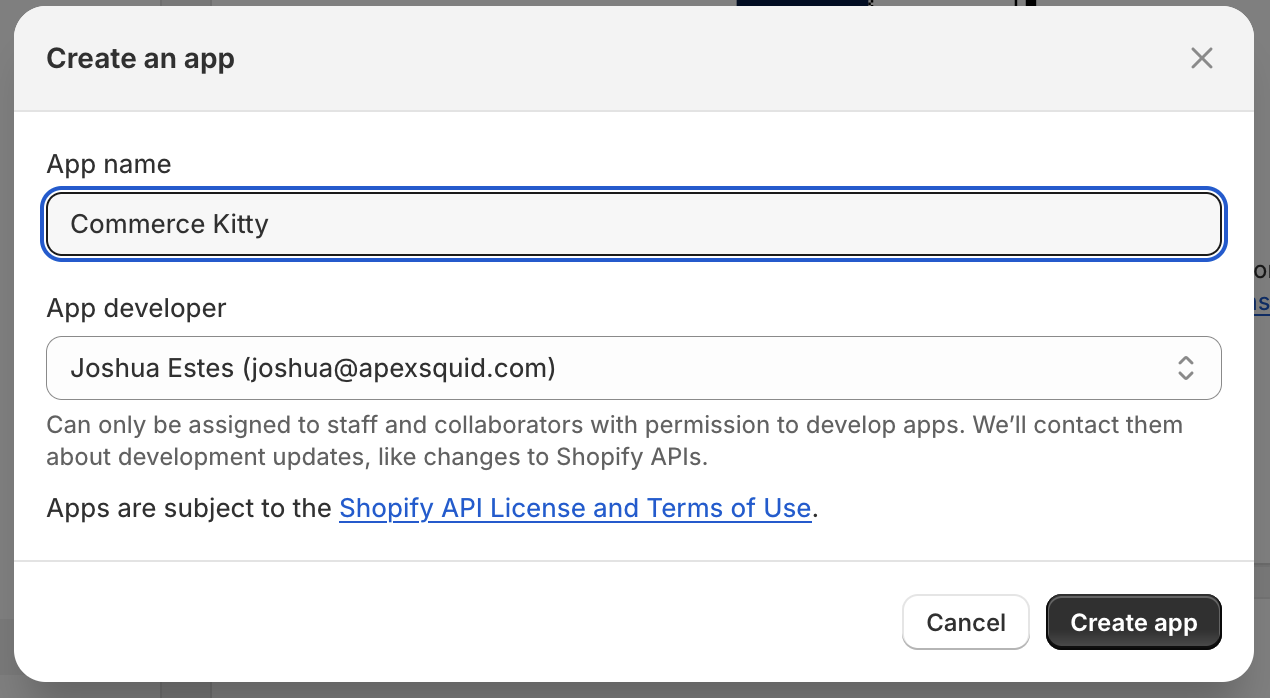
Enter Commerce Kitty as the app name
Click on the Create App button
You should now see a screen similar to:
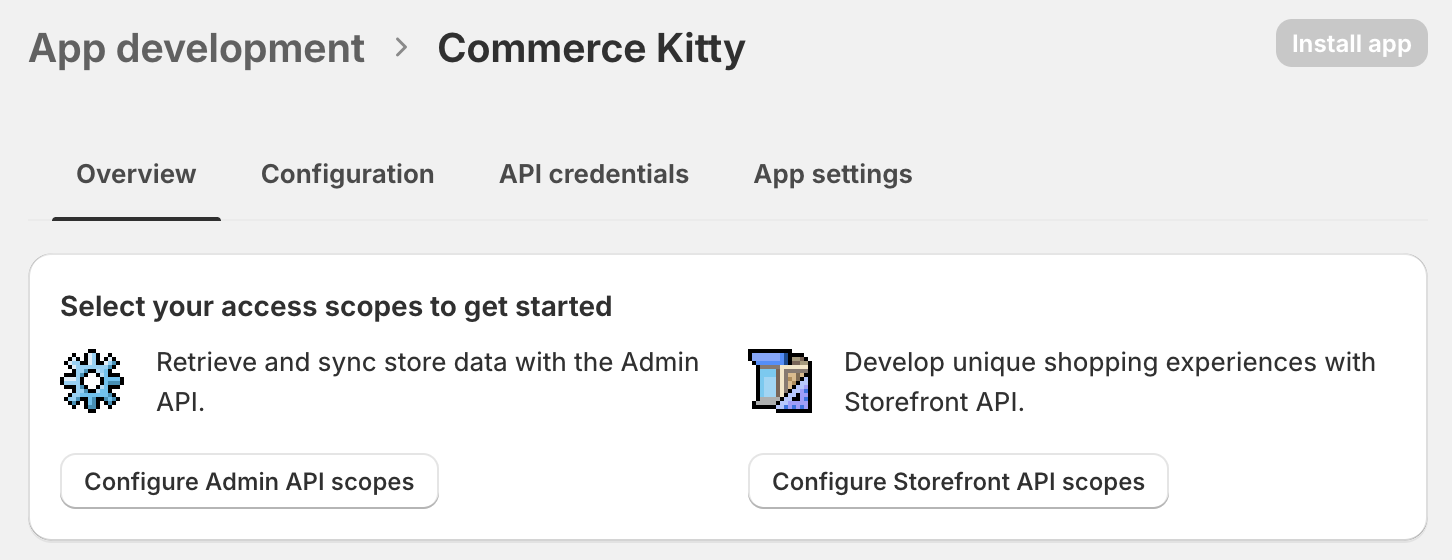
You will next click on Configure Admin API scopes button.
You will need to select as many permissions as you are comfortable with. Depending on what functionality you want, you may have to select more or less.
Commerce Kitty requires a lot of these permissions to be checked. Specifically the write permissions. If Commerce Kitty does not have the correct permissions, you will be notified and some of the features may not work until these permissions are updated.
Once you save the permissions, you will need to navigate back to the Overview screen.
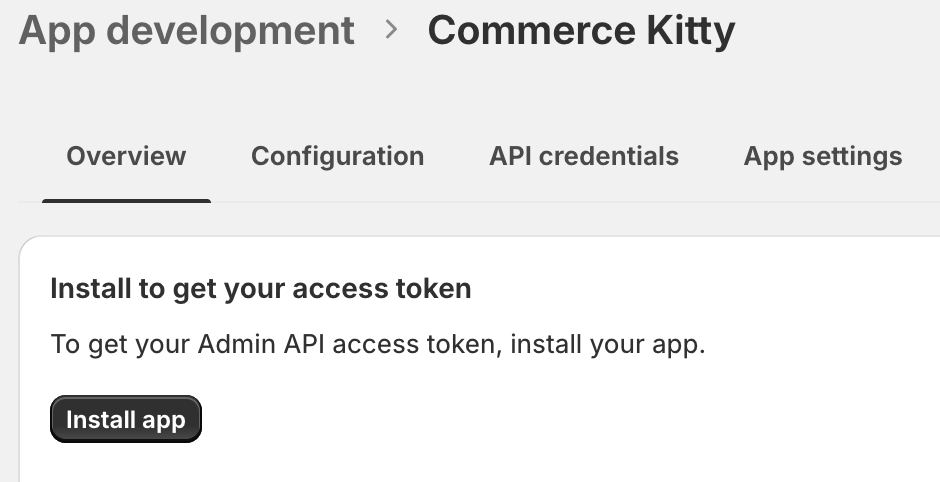
Click on Install app button and you will be presented with the following pop-up
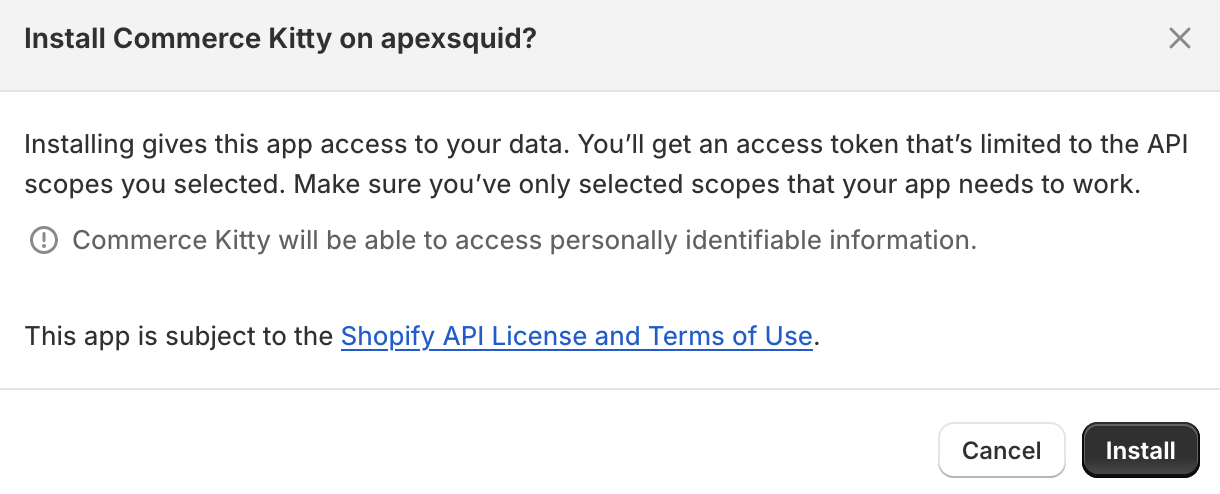
Click the Install button to continue.
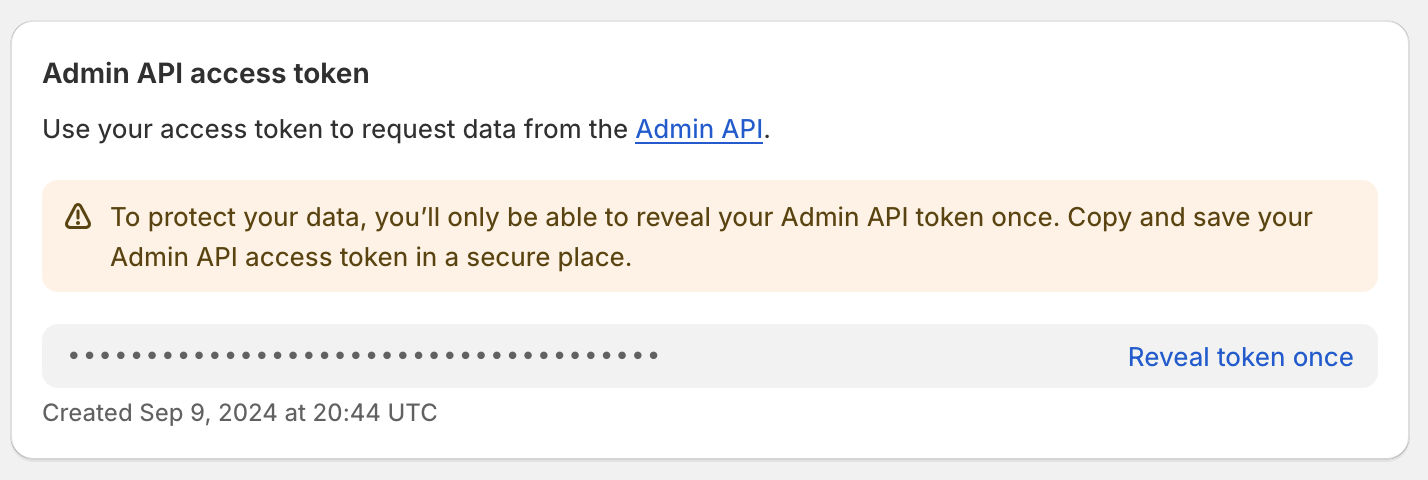
You will need to copy/paste this token back into Commerce Kitty along with your myshopify.com link.
Fields
Shop
The shop is the name of your Shopify store.
Access Token
The access token is obtained from Shopify.
The Access Token is hidden. The only time this token is updated is when you enter data into the field.
Commerce Kitty takes security very seriously. We encrypt all sensitive data.
Plugin Options
Export Tracking
When a shipment has been shipped, this will update the order with tracking information within your Shopify store.
You MUST have Import Orders enabled.
Import Orders
When enabled, Commerce Kitty will pull new orders from your Shopify store.
When enabled, you can ONLY assign the plugin to one Channel. The plugin will not import orders if it is assigned to multiple channels.